We independently choose and evaluate products.
If you purchase using our links, we may receive a commission, which helps fund our product testing.
Building a Home Shooting Range
Trending: Best Body Armor, Best AR-15s, Best Pistol Red Dots, Best LPVO
We started building a home shooting range and decided to document the process. We hope you enjoy watching it come together, and if you have suggestions for our first home shooting range, comment and let us know!
If you aren’t building a shooting range but want to learn more about going to a public shooting range for the first time, check out our guide.
I’m in no way an expert range builder, so take any advice and try any techniques at your own risk!
Planning
Determine the size range you can safely create with the space that you have. I took some initial measurements, and I’m going to shoot for a 50 yard by 30/40 feet range.
The land that I’m working with has quite a few trees and some underbrush. The brush isn’t very thick, but the trees range in size from a few feet in diameter to a few inches. Trees and any natural obstacles that may interfere with your shooting lane should be cleared.
Tools/Marking
I’ve had a chainsaw for a few years, but it wasn’t one I’d run for several hours, let alone run hard. So I picked up a brand new Stihl Professional series MS261 C-M.
After picking up the chainsaw, I decided to walk the area again to mark it off. I used a few fiberglass posts I had lying around to mark the area I wanted to clear.
Get Started
I recruited a friend of mine for some free labor. We walked over the area again and came up with a plan. We started with the smaller trees to thin out the area to see what we were working with.
For safety and to make the job a bit easier, we decided to lay the decent size trees where the berm would eventually be. To clear the area, I dragged the trees tops and leafy limbs behind the berm area so they wouldn’t be in the way of our working area.
Update: I wanted to create a running cost total through every stage of the range build. Some of the items will be optional, but I’m keeping track of each to note my expenses through the process.
| Item | Cost |
| Stihl Chainsaw | $579.95 |
| Running Total | $579.95 |
Watch the video we put together for day one of the Building a Shooting Range Series:
[Update 7/15/20]
We are building a new home shooting range, and we’re taking you along for the ride by documenting the process. Welcome to our second update, or as we like to call it, “Where We Are In The Process as of The End of June.” If you’re new around here, we are working on building a backyard shooting range. We also started a running tally of the cost of the range, so you’ll know what to expect if you are interested in building your own.
Disclaimer repeat: I’m in no way an expert range builder, so take any advice and try any techniques at your own risk!
Trees
I’ve never had more respect for arborists in my entire life. I’ve got trees EVERYWHERE. But that’s a good thing. I wanted a natural barrier to cut down on the sound for my neighbors and keep the range relatively private, so carving out a spot for it in the woods is ideal.
I, once again, enlisted friends help felling, bucking, and limbing the trees on the range. One of the larger trees we felled was about a three-foot-wide, 100-foot tall pine that came down like a champ. Even Harry’s Holsters laughed at my excitement of how well the felling of such a large tree went.
I still have quite a few trees left that need to come down to clear the full shooting lane. But I’ve stopped any more tree felling until step 5 is complete.
Under Brush Decisions
Fortunately for me, building a home shooting range is a legitimate business write-off, but just because it’s a business expense doesn’t mean the money doesn’t have to come from somewhere. It’s nice that I’ll save a little on taxes, but it’s still an out-of-pocket expense.
With that being said, I had to make some decisions about spending money that would save time, energy and be more efficient than my initial DIY approach.
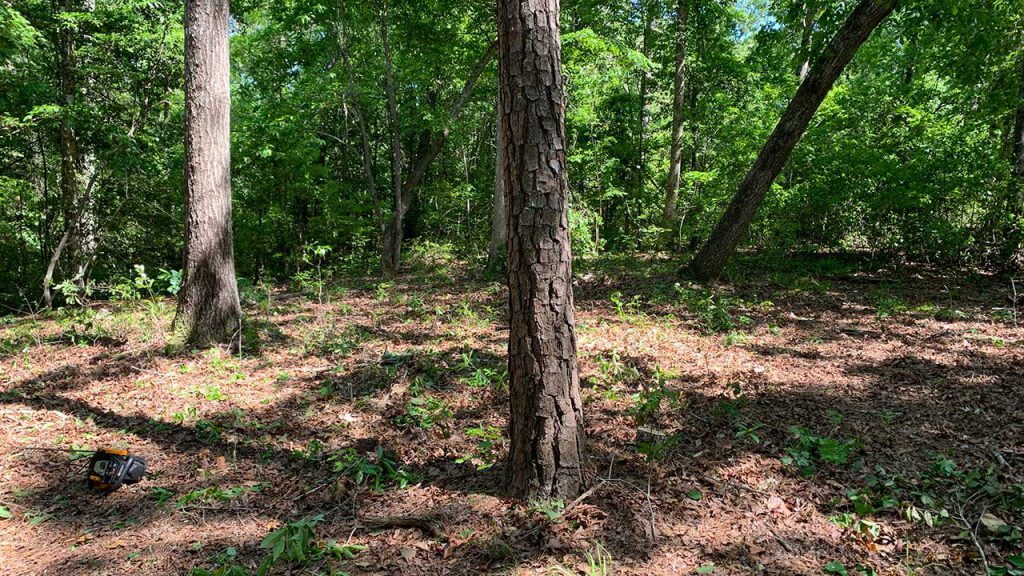
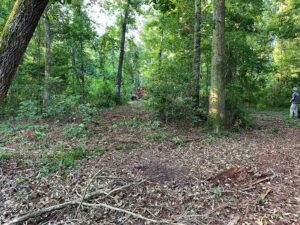
As you can see above, I have a lot of underbrush, including a number of trees about the diameter of a softball or smaller.
Taking these out by hand is easy but requires time and effort, including figuring out what to do with them after they’re down. So I decided I needed to have someone come in and take care of the underbrush so I could focus on the big trees on the property.
I reached out to Monster Mulching to come out and handle the underbrush and small trees. The next update will feature this phase because it’s awesome to see the before and after photos and videos of these forestry mulchers.
But back to Part 2, deciding to underbrush this way wasn’t cheap, so a lot of thorough groundwork needed to be done before he arrived to mulch the shooting range.
After the mulching was done I had to then grind the stumps to clear my shooting area. For that, I called my local NC stump grinding company rather than handle it myself.
Drainage
The range area is not actually situated on any wetland. It’s situated on the highest pitch of the area but slopes on the backside, making it perfect for the back of the berm. The bullet will always be traveling down toward the ground.
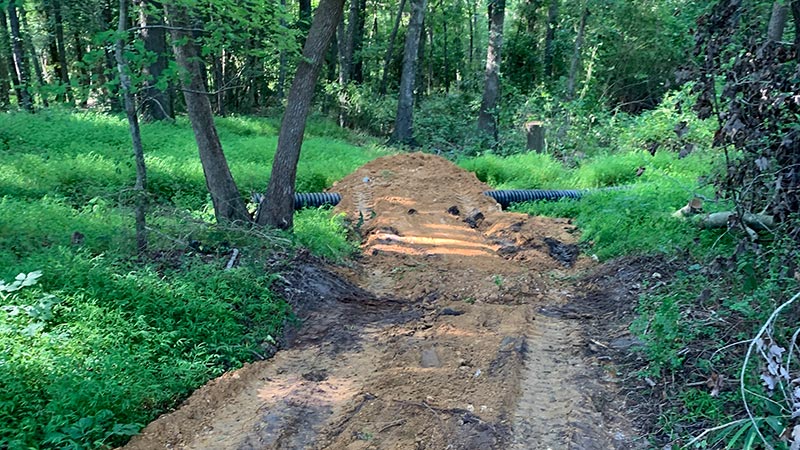
However, the entrance to the range is where a drainage ditch should be, so any runoff or excess water can run toward the nearest creek.
The issue with where the water is currently draining is that if it rains a few days before Monster Mulching comes to mulch the range, he won’t be able to get his several thousand pounds high-pressure hydraulic skid steer through the wet mud.
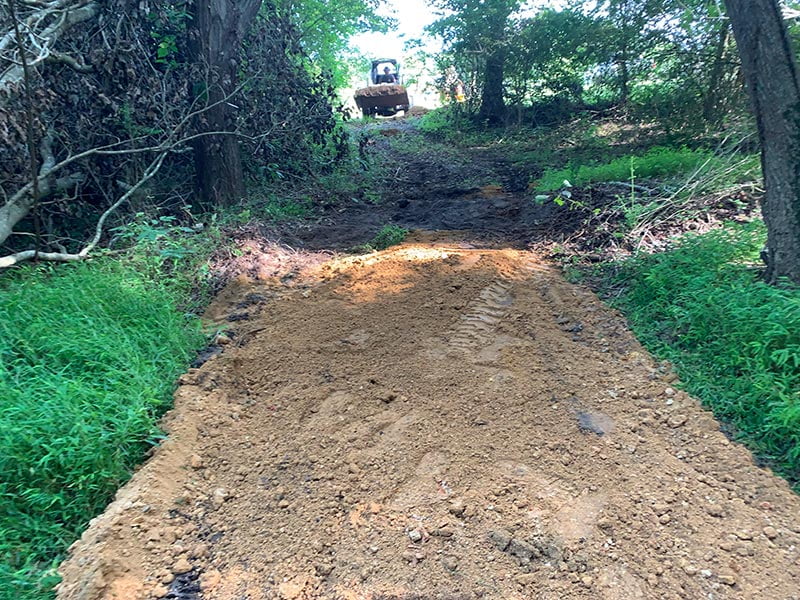
Once again I had to spend some money. This time on a 15-inch by 20-foot culvert pine, I would cover with dirt to make a land bridge to access the higher range. But it wasn’t just the culvert pipe that cost some coin.
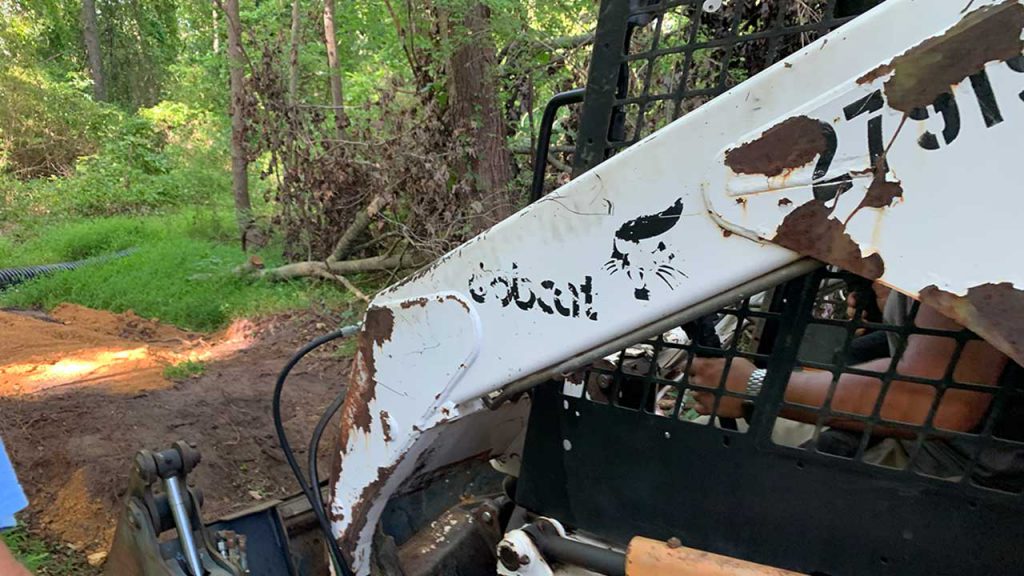
I don’t have an abundance of dirt laying around, much less an efficient way to move it (i.e., a skid steer with a bucket or tractor with a bucket).
So I got a tandem load of dirt delivered and harrassed my brother until he let me borrow his skid steer. I tried moving some of the dirt by hand… friendly advice – don’t bother.
Recap & Cost thus far
We felled around 15-20 trees of varying sizes since starting the range project in May. There’s a functional space of around 25 yards that could be used; however, there is not a berm I feel is functional enough to stop rounds at this point.
The berm will probably be the last portion of this project. Getting to the berm and working around it will be much easier once the underbrush and trees are not in the way.
The far side of the range has not been touched yet to allow Monster Mulching to handle the bulk of the work since it’s largely small trees and underbrush.
The cost has increased slightly; the table below shows the added cost so far in Part 2 and the running total.
| Item | Cost |
| Stihl Chainsaw | $579.95 |
| Culvert Pipe | $296.77 |
| Dump Truck Load of Dirt | $175.00 |
| Running Total | $1,051.72 |
[Updated 7/19/20]
Welcome to the last update on building our backyard shooting range! By far the biggest leap toward a completed range, and you’ll see why shortly. If the parts of this article were named, you could call this the “mulching” part.
The video at the bottom of this post is the longest thus far in the series and probably the most interesting to date. I’ll try to continue to make them more interesting. If you haven’t done so already, check out part 1 and part 2 of the series.
Disclaimer repeat: I’m in no way an expert range builder, so take any advice and try any techniques at your own risk!
Mulching
Forestry mulching is one of the coolest processes to watch. That being said, reading about it is rather boring. So let us get right to the pictures of before + afters—big shout out to Monster Mulching for really speeding up creating our range.
Obviously, this isn’t a totally DIY shooting range build, but the alternative option would take years to complete.


Cost
| Item | Cost |
| Stihl Chainsaw | $579.95 |
| Culvert Pipe | $296.77 |
| Dump Truck Load of Dirt | $175.00 |
| Mulching | $1,500.00 |
| Running Total | $2,551.72 |
What’s Next?
Next will be to remove the remaining trees inside of the shooting lane. The plan is to do a time-lapse video felling the remaining trees in the lane and removing them from the lane. Once that is complete, I will rebuild the road that leads to the range to get fill dirt to the berm. Some big decisions about the berm will need to be made once the road is complete. The new estimate for completion will probably be early September, just in time for fewer bugs (hopefully).
Building the Berm
Building a range is a multiple-step and multi-day/month process. But one of the most important parts of any shooting range is the berm, or aka the thing that stops the bullets when you miss.
If you never miss a shot, this part isn’t for you, John Wick.
Disclaimer repeat: I’m in no way an expert range builder, so take any advice and try any techniques at your own risk!
Initial Thoughts
Stopping bullets is obviously the key component to any shooting range berm. So I had to first decide how I wanted to create the berm for the Lynx Defense home shooting range.
Use Trees to Stop Rounds
The trees I cleared in the first update left me with a ton of lumber that could be used as barrier walls for a dirt berm.
The original plan was to stake rebar in the ground and stack the tree trunks and limbs between rebar sets, creating footers. Then I would stack the cut trees between the rebar sets. The more I thought about this method, the more I realized how difficult it would be to execute given the varying size of the lumbar available. Not to mention the possible gaps in the trees and the fact the berm would eventually biodegrade.
So scratch that.
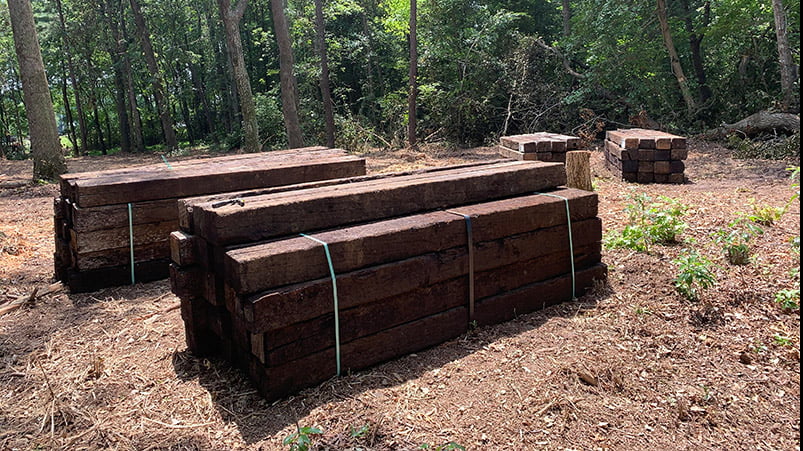
Use Railroad Ties and Dirt
The most popular of all berm walls/backstops are railroad ties. I started to price them out and look at the logistics of installing a berm this way. It wasn’t cheap. With in-stock railroad ties being nearly $15 a piece I knew this would be a sizeable investment.
Final verdict: I eventually ordered 72 railroad ties.
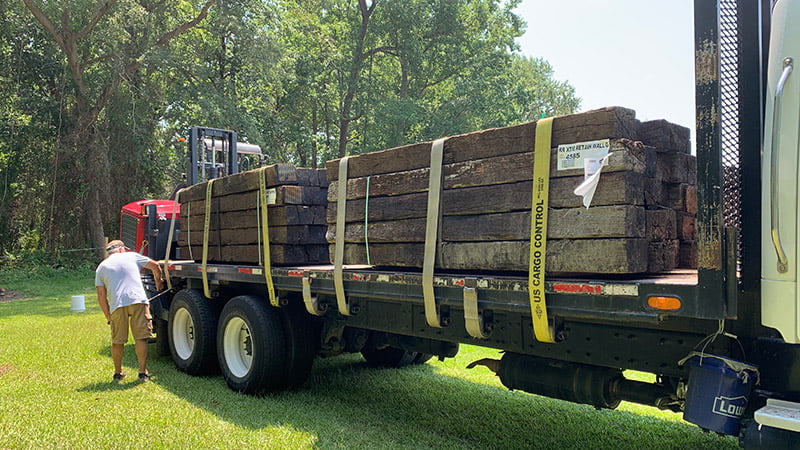
I wanted to create a wide enough berm to move around while running drills, so the final width came out to be 35 feet. I also wanted to include sidewalls to help stack the dirt without spilling out on one side.
Another key feature of the berm is its height, which is arguably the most important safety feature. Currently, the berm will be about 7 feet high. I plan to add some height to it later, but it’ll stand at a taller-than-the-average-man 7 feet tall for now.

The NRA and other range experts recommend a minimum of 12 feet for berm height, but in this case, I did not have easy access to the required equipment to make the berm quite that tall. Since it’s on private land that I own, it’ll do for now.
I want to reiterate this is a personal/business range only and will not be open to the public. Anyone with access to the range and with permission to shoot there will likely be very familiar with firearms and firearms safety. And I’ll know them personally.
Berm Building Video Time!
Here’s a quick time-lapse putting up the back wall of the berm. We reinforced it on the backside with some large tree sections, but I will be going back and bracing it correctly before the dirt is brought in.
Cost
| Item | Cost |
| Stihl Chainsaw | $579.95 |
| Culvert Pipe | $296.77 |
| Dump Truck Load of Dirt | $175.00 |
| Mulching | $1,500.00 |
| Railroad Ties | $1,071.36 |
| Running Total | $3,623.08 |
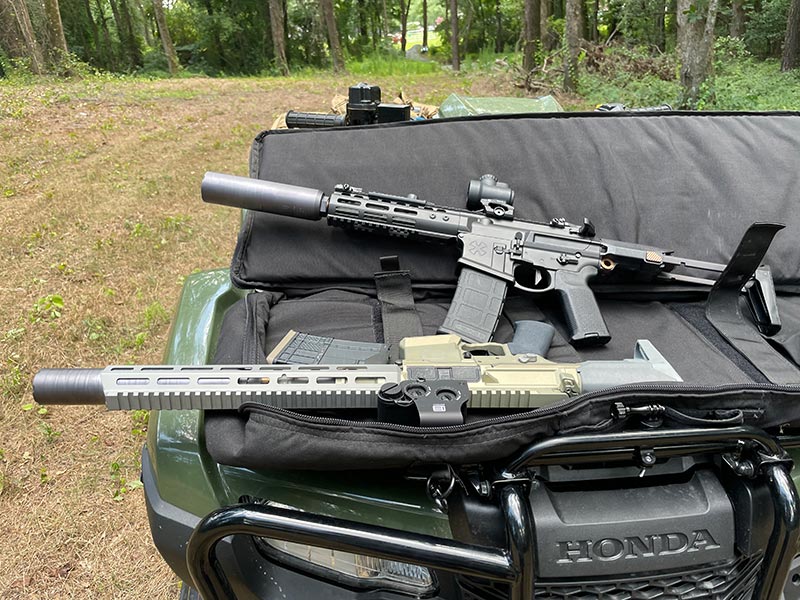
Range Targets
I already had a few of the best metal range targets, but I wanted to add a few more metal targets to add a nice dynamic shooting experience on the range.
Shoot Steel targets were the winner for new steel targets. I was able to get my hands on Armadillo Short Range Rifle Target Package.
Armadillo Target
These targets are well made and come in a nice compact box. So far, these targets have been great, and the best part, no 2×4’s to replace!
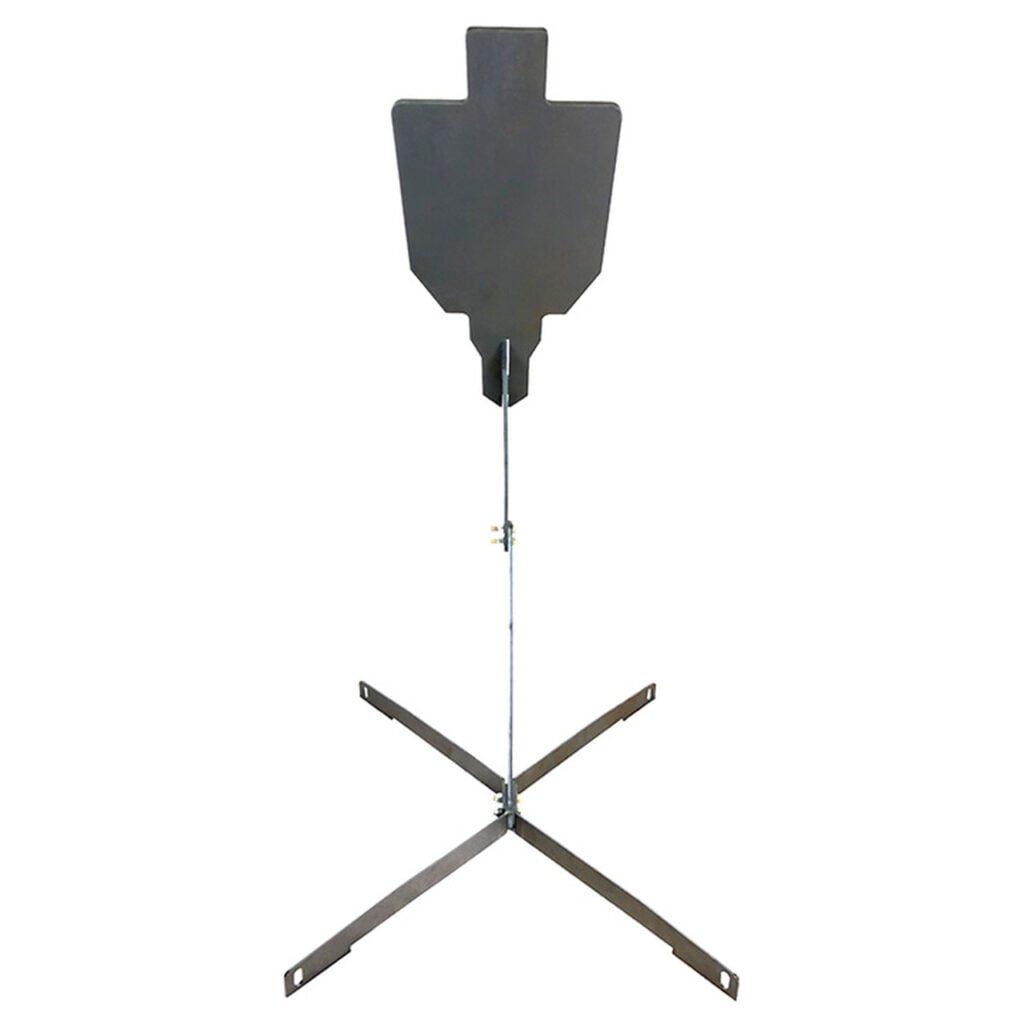
I’m working on getting these targets set up and will report back with a full shoot steel target review in the future.
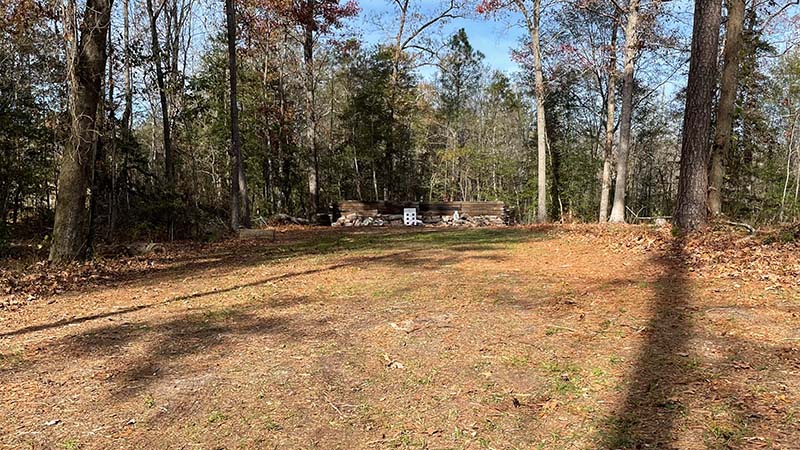
Dirt for the Berm
Recently I received about 5 tandem dump truck loads of dirt for the berm. As you can see in the previous pictures I only have the cut trees between the railroad tie berm.
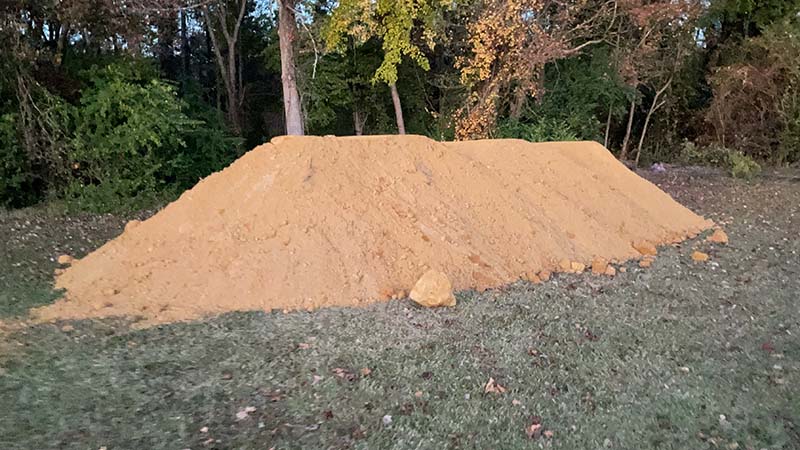
Will be taking the dirt back one bobcat load at a time and building up the berm, finally.
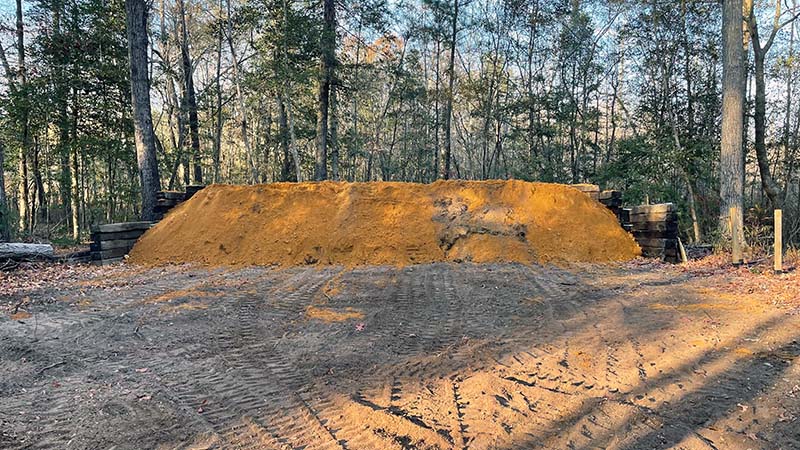
I’m excited to finish it up and here’s a picture I took today after I cleared the leaves from the range.
Further updates are forthcoming and I’ll try to document the berm install as well as a few other plans I have for the range. Here’s an update on the cost.
| Item | Cost |
| Stihl Chainsaw | $579.95 |
| Culvert Pipe | $296.77 |
| Dump Truck Load of Dirt | $175.00 |
| Mulching | $1,500.00 |
| Railroad Ties | $1,071.36 |
| Dirt for Berm | $1,000.00 |
| Running Total | $4,623.08 |
Completed Berm
Finally! Today the berm was filled with luscious bullet-stopping dirt.
This day seemed to take forever because I put other things before the berm dirt but now it’s complete and I couldn’t be happier with how it turned out!
Future of the Range
The range has turned out great and has been a ton of fun and has made making content for this site much easier and faster.
In the future, I plan to rent a small bulldozer to get a completely flat shooting surface to make a true “flat range”. When I do I will likely bury the wings of the berm in dirt and make dirt wings.
One major mistake I made was not interlacing the railroad ties in the rear which lead to it caving in the middle. However, the berm stands fine and does its job of catching rounds that don’t strike the target.
I will be doing a video update as I’ve had several requests recently.


How many yards of dirt did you bring in to make the berm?
I know this a little old but could you tell me what size property this was built on. Looking to do this on 5 acres but I feel like that is not enough space?
5 Acres should be plenty this footprint is probably only an acre.
The only problem I see , that is only a problem in my eyes without seeing other buildings /homes all I know is I have seen 9mm visibly ricochet a football field and a 308 even worst in mid june or a drought . You’ll want to end cap it make and make a bear cave like arrangement. Solid drought dirt a solid miss and it will fly up in the air for along ways. Sand at the bottom does a great job at absorbing steel plate splatter from bullets. Best of luck glad to see more doing this.
How far away is the range from any other structures
Nice work you have done there, congratulations and enjoy it!
Most people always learn something as they go along, I’ll bet your next range will be even more awesome.
More people are considering these, as the expense adds up when you go often to shoot at a commercial range.
At the time you are shooting, how do you assure no one or animals behind your brim? What signage have you posted around your range? How far away from your home is the range? Have you any livestock?
I admire the work you put into building a safe range. I have a similar set-up with some on-site adjustments. Unfortunately, a neighbor has decided that he doesn’t have enough room on his land to shoot so he built a 5 foot dirt mound full of trash on the property line pointed at our property. He calls this a “berm” and shoots into it and doesn’t seem to understand why we would have a problem with this. Or he understands and just prefers to try use our property.
I respect your enthusiasm, hard work, attention to detail and dedication to getting your range done. I’m a tactical firearms and CQB instructor. I conduct classes locally around the US and overseas. These are not your run of the mill courses. Courses can be modified to suit the clients needs. You’ll be moving and shooting, cover/concealment, qualification/combat courses, tactics/techniques/principals, etc. Way too much to describe here. If your interested I can come down and do something for you at your range. Let me know if you’re interested.
About to buy five acres with miles of national forest downrange. I was thinking of an “L” shaped berm for movement drills and widening my skill. Would you go with tires now that you look back? have you thought about making a clear line of sight (not necessarily ground cleared) for long-range shooting (100-200 YDs)? Any tips on this would be great.
Looking back, I would have still done mine with the railroad ties, given my lack of available heavy equipment.
However, if I were to do it over, I would have rented/paid for heavy equipment to come in and build a dirt berm and do some ground leveling.
That is still an option in the future, but I would want more land with a longer range possibility.
Are straw bales an effective stop?
In most cases, no. I would not use straw bales as a backstop in any configuration.
I used old tires to give my berm structural stability. The tire shops have to pay to dispose of them, so when I said I’ll take them for free they were very happy about that, I just took my trailer up there and they loaded them up, 3 months of weekly trips gave me enough tires to build 8 ft talk and 4 ft deep, completely filled with dirt.
Hindsight I might have gone the tire route because that would have saved costs and honestly tires would be easier to work with over the railroad ties.
Having the same type of problem with our neighbors so my question is are you having to keep track of every single shell and bullet?
I built a small range. I hired a kid with a drone to shoot video of property and landscape up to one mile directly behind my berm of sand in case a neighbor said one of my bullets hit them or their house. I keep a log of what we shoot that day. Libs have been complaining to the sheriff who says we have a right to shoot but need to know where bullets went…sound stupid but my uncle is an insurance agent. He also suggested a 1million dollar umbrella policy like having a swimming pool in case kids or strangers jump the fence and use it. I have Ring Cameras also.
Saving this to show my husband! I will need some help with this!
Wow I wish I had more than my 1/4 acre. I’d love to build one of these
Need to buy more land just to build a home range haha!
Like most this is a dream but not going to happen in the city
it’s getting too expensive for us little guys, but gives me ideas for a covered pistol range.
Yea, it’s getting more expensive than I originally planned but I figured since it’s in my backyard might as well do it right!
Wish I lived where I could have my own shooting range set-up!
It’s always been a goal of mine to have! Really happy now that I’ve been able to make it happen.
Very nice backstop!
It looks nice but wood is not the best way to stop a stray.
The berm isn’t finished we will bring dirt in and use the berm as more of a dirt catch than a bullet stop.
I’ve been thinking of different ways to build a range for myself and these are both great ideas.
Yea, just figured we would go all in and get the more permanent berm option. But either way will work!
Admire your drive getting this thing done. Certainly need that 2nd person to help moving those big ties around! I noticed pounding spikes into the ties on each layer, though I think I might have gone with staggering the ties as you added height.
I had to have help with those railroad ties! I’ve had a ton of help from friends getting this thing done and I’m so close but the last step I’m going to have to have some heavy equipment.
How many acres is your total property ? I was wanted to do
Something like this
This range sits on less than a full acre and sits right at about 80 yards. Total property is more than that obviously.